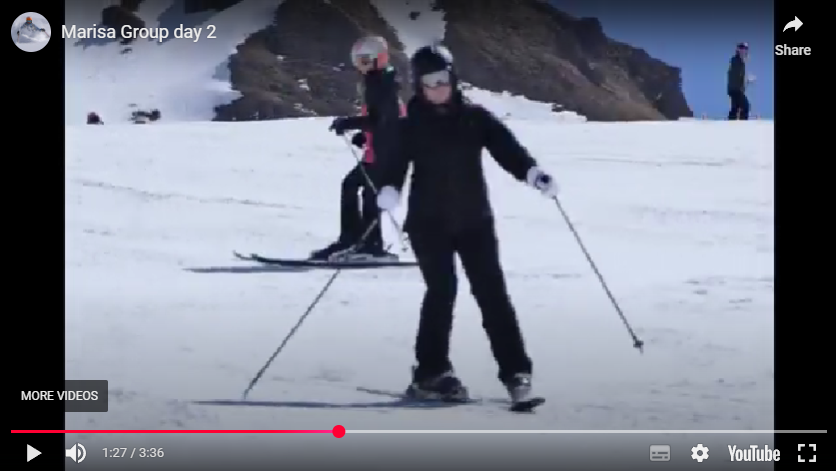
The entire group is doing well and willing to tackle fairly complicated biomechanics – but there are no shortcuts to success. The complexity evaporates when you realise that it’s all about “falling over” and skating – extending the outside leg in the process and relaxing the hip joints while activating the core. Those are concepts and actions which when felt clearly simplify everything.
David: in the softer snow (video clip used) the dynamics and skating are clearly visible and also a degree of hip angulation. Perhaps even the feet were being everted -or at least twisting them into the turn has stopped.
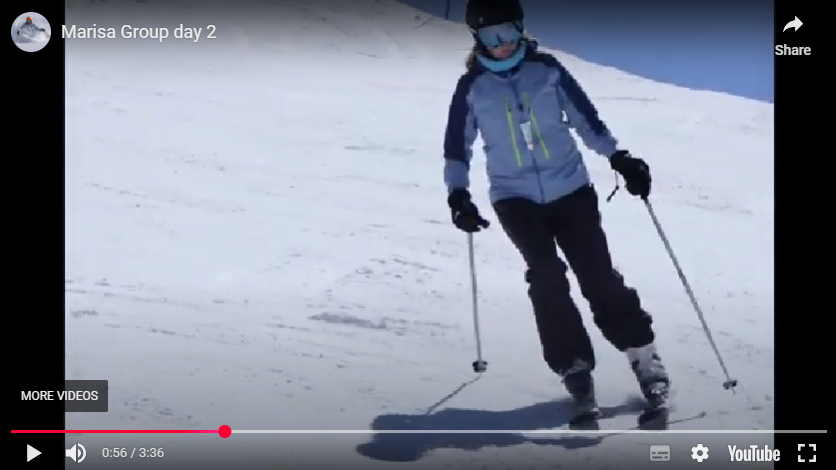
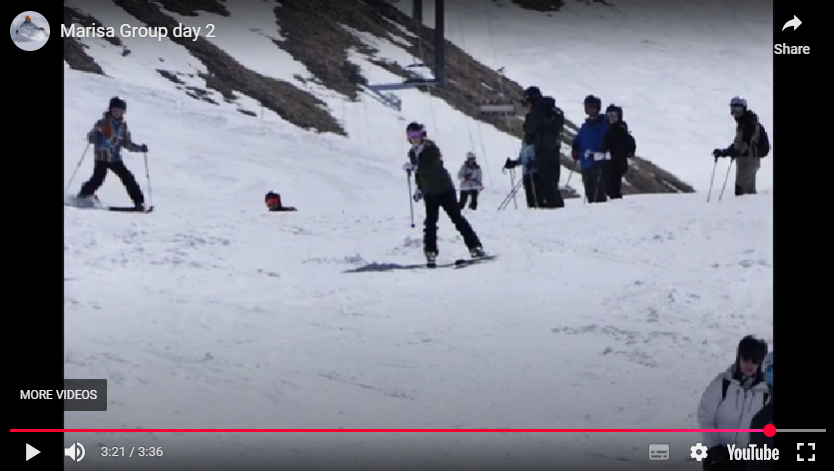
Marisa: Coping well on ice and after a serious collision and twisted knee. You can see the inclination from dynamics if you freeze frame. On ice hip angulation needs to be increased towards the end of the turn to set the skis on more of an edge and complete the turn with a marked grip. It’s natural to do the opposite of this because it’s counter intuitive. A bit on the backs of the boots – probably due to the ice and the injury.
Ali: Good rhythm. Everything happening but a few gremlins getting in the way. The skis crossed due to using the lower ski as a platform while stemming out the upper ski – with the intention of lifting the lower ski out of the way. There’s several ways to stop this from happening that we can look at tomorrow – and all of them will improve dynamics.
Jay: Much improved posture for dynamics and angulation due to being more tilted forward at the hips. When skiing the ice on the “Troll” make sure to drop into deeper angulation to stay forward and get and edge grip as you complete the turns. It’s the deep angulation that gives grip. Never let yourself get in the back seat and just skidding! If you find me blocking your way it’s because I turn tightly with grip and it slows me down – it’s your job to adapt to this constraint – it’s deliberate – just the same way as skiing through slalom poles serves to develop your control as you adapt!
Alfie: The skating and carving are fine – good dynamics and working hard at angulation. Just needs to be tidied up a bit. If you want to carve in slush then keep your feet closer together by using the adductor muscles – instead of using your inside leg as an outrigger.
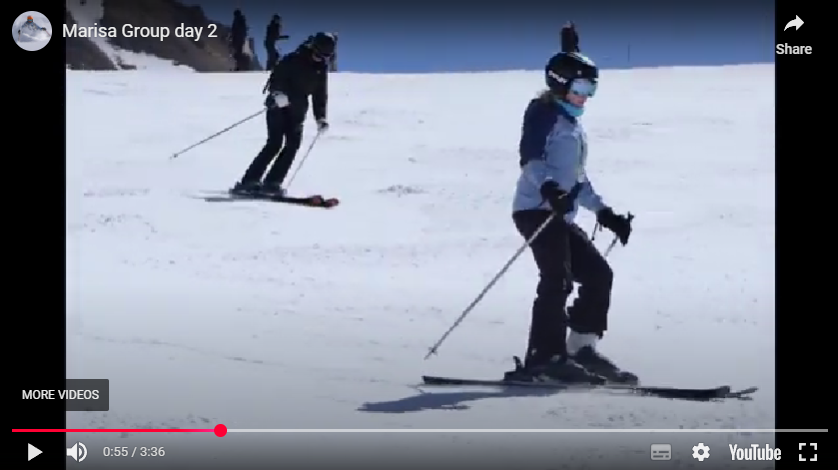
Maddie: Before being filmed you skated step by step in towards the centre of the turns. When you set off for being filmed you had lost concentration and started skating out towards the outside of the turns. In the video you can see your centre of mass being moved step by step in the wrong direction. You already proved to me that you can do it the correct way – try not to let distractions and anxiety take over – you can do it! You are a very good skater.
Sideslipping (Joystick control)
The main practical purpose of sideslipping is to get down the mountain without picking up speed. Many learners are deprived of this skill because it is generally undervalued and has become even more neglected due to the complete domination of carving skis. Wider skis are easier for sideslipping in a greater range of conditions. Parabolic skis have some trouble gripping on ice during a sideslip, but modern “double rocker” off-piste skis give a smooth and grippy sideslip in just about every condition, including ice.
The skis are kept on edge by the lateral stiffness of the ski boot shafts. Skis over 100mm wide underfoot begin to create problems on hard snow due to the extra leverage from the edge through the shaft of the boot. Those skis can be very unpleasant on-piste and it’s one limit of how an “all round” ski can be defined. Anything wider than 100mm is not “all round”.
In ski teaching the sideslip serves specifically for developing fall-line skiing. Fall-line skiing is where the skier’s body travels directly downhill and not so much across the hill. This would apply to bumps, steep off-piste such as couloirs and deep powder snow. Slalom is not “fall-line” skiing. (The mechanism of initiating the turn with a sideslip is called “pivoting”.) The skier should be able to sideslip on either ski or both at the same time. It’s normal to start off with both skis on the snow, skis parallel and with the majority of weight on the lower ski just to get a feel for it. The stance is normally quite narrow to prevent the uphill ski from catching the lower edge. Most beginners have trouble keeping the skis close together if they have previously learned to snowplough.
It should be noticed that only the uphill edges of the skis are in contact with the snow so the downhill edges are in the air.
Pulling the legs together with the adductor muscles on both legs ensures the best options for control. Pulling both legs inwards keeps a narrow stance and when the skier practices sideslipping on one leg it ensures the that centre of mass can easily be placed above the appropriate hip joint. Sideslipping is facilitated by subtle movements of the centre of mass – moving it downhill to slide and slightly back uphill to stop. There’s no need to use the feet or knees to try to sideslip – just moving the centre of mass in a manner resembling a joystick rapidly leads to developing awareness of how subtle movement of the centre of mass has pronounced effects.
Sideslipping can be practiced on the uphill ski only, with the adductor muscle pulling in the downhill direction and the pressure still kept on the uphill edge of the ski and hence on the outside edge of the foot. You don’t try to stand on the outside edge of the foot the pressure there is an effect of the ski boot construction / lateral stiffness of the boot cuff running up the lower leg.
If the fronts of the skis are pushed downhill (Joystick Control – by moving the Centre of Mass forward slightly) then with there being no contact of the downhill edges the skier goes into a controlled forward diagonal sideslip on the uphill (braking) edges only. Likewise if the tails are pushed downwards during the sideslip then it turns into a backwards diagonal sideslip. Being able to alternate between straight down the fall-line and the two diagonals is a precursor to the skill necessary for pivoting in the fall-line.
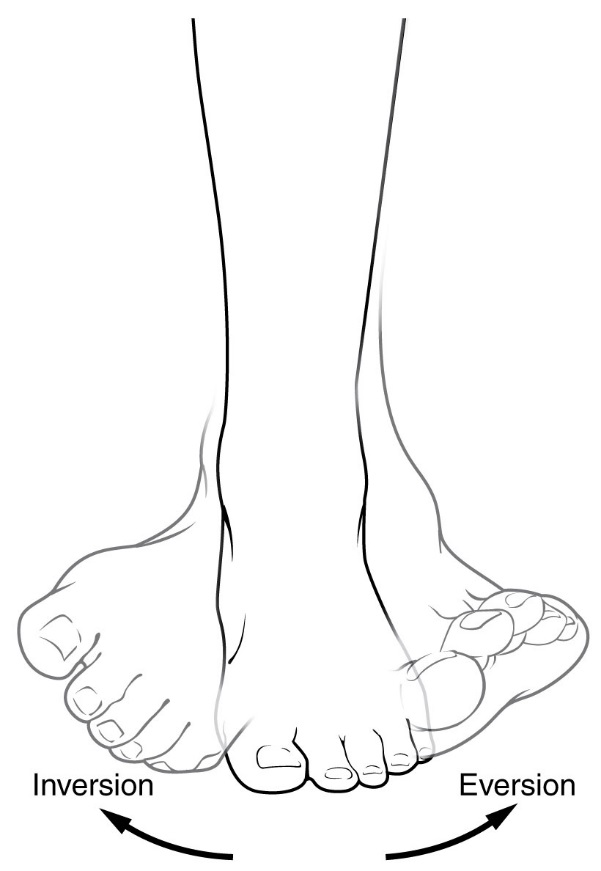
Everting the Feet
When the skis are parallel the feet still “diverge” (as if skating) inside the ski boot – each foot being turned outward (everted). This obviously isn’t visible. This is to combat the tendency to twist the foot inwards to”turn” the ski directly -a mistake which flattens the ski and causes loss of grip.
Body Management (Hip Angulation, Anticipation, Control of Rotation, Linked Short Turns)
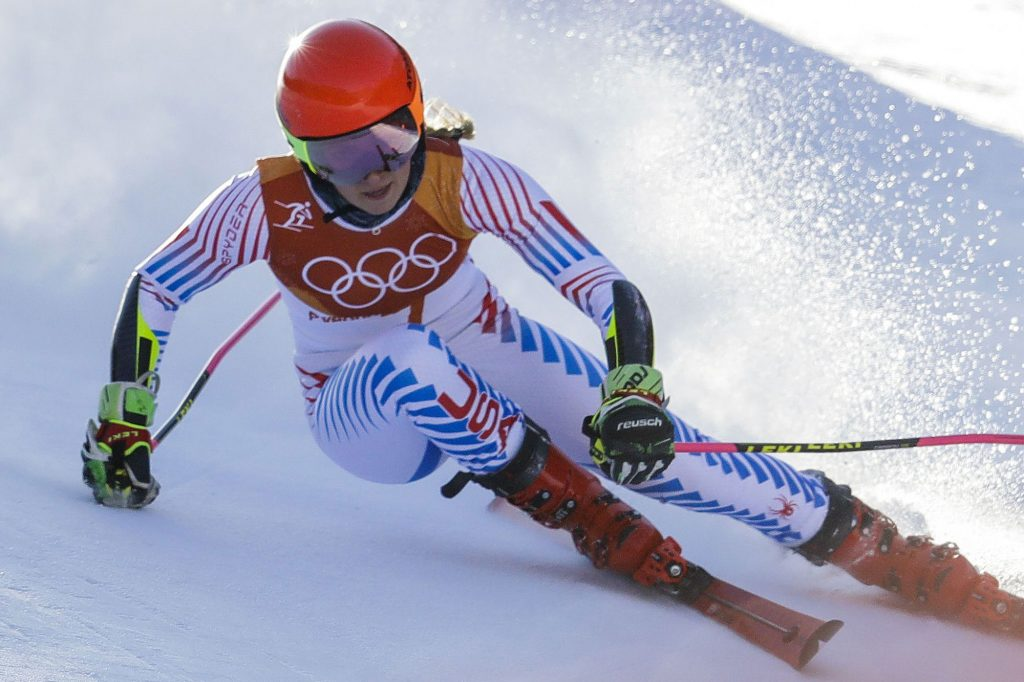
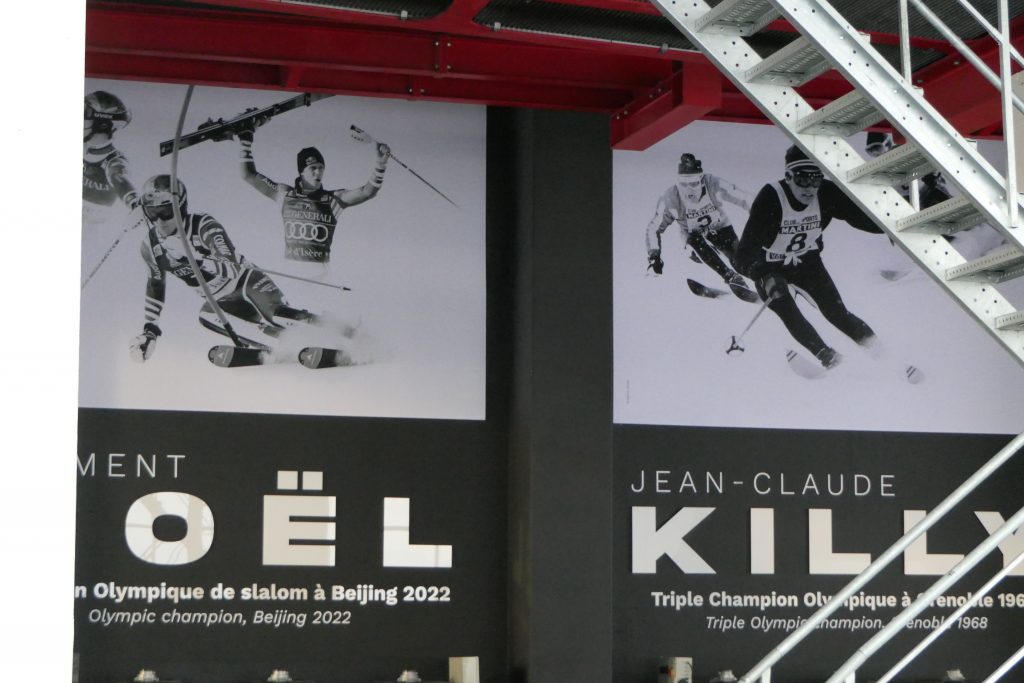
Take a look at the two Olympic champion skiers in the photograph below.
Killy’s image from the 1960s has his chest facing downhill whereas Noel’s image from 2022 has his chest facing forward. What Killy is doing destroys your lower back and is probably why he never went on skis again after he stopped racing.
Protecting the Spine
- Hold the front of the pelvis up – aiming for “neutral pelvis”
- During the turn pull the outer hip backwards so that the ski doesn’t pull it in front of your ribs
- Look for a stretch between the ribs and hip joint
- Look for a reflex contraction of the lower abdominals – the postural reflex
- Keep the shoulders/chest following the skis (to some degree)
- Always “counter turn” the pelvis more than the chest/shoulders (It’s only the pelvis that should “face downhill”)
- Pulling the hip backwards also prevents both hip rotation and full upper body rotation
Source of Hip Angulation
The upper body needs to tilt forward over one hip joint – then rotate around it. This is in addition to pulling back the outside hip etc.
The body shape produced alters the location of the centre of mass enabling pressure on the ski fronts and also greater agility both into and out of turns – and pole planting if the skis are swinging laterally.
The hip angulation also provides flexion of the hip joint that gives absorption of shocks. Increased angulation also increases the edge angle of the skis to the snow and may alter the turn radius and grip.
Angulation when upright and pivoting has another function – when ANTICIPATING the next turn it is used to get the Centre of Mass out of the existing turn (by tilting the torso forward at the hip ) and letting the Centre of Mass move over the skis to plant the ski pole downhill for a strong, clear and definite support.
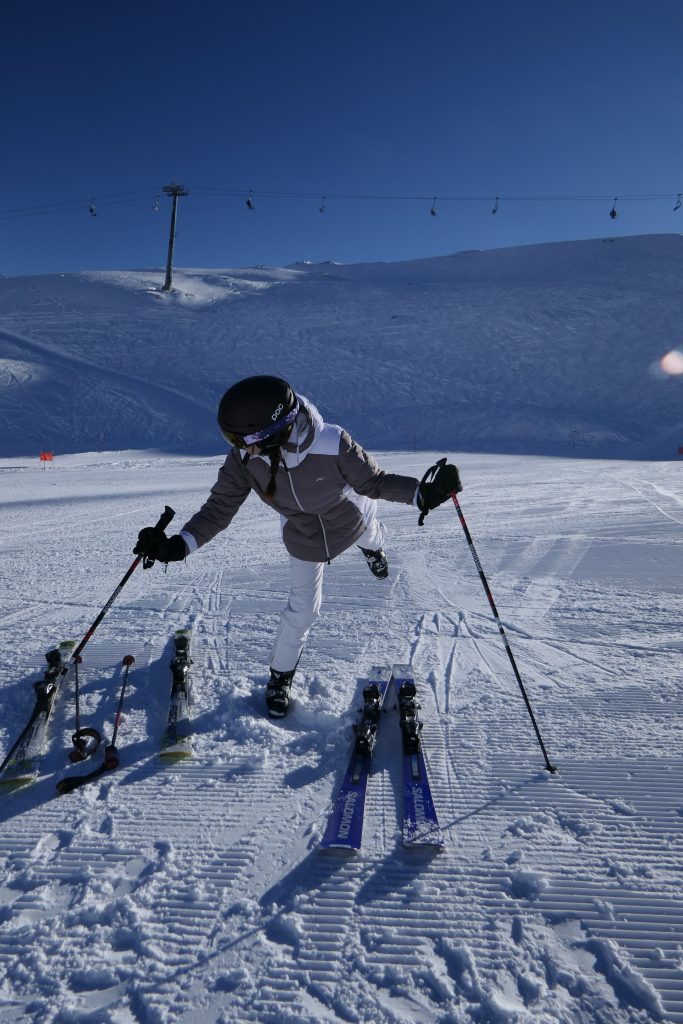
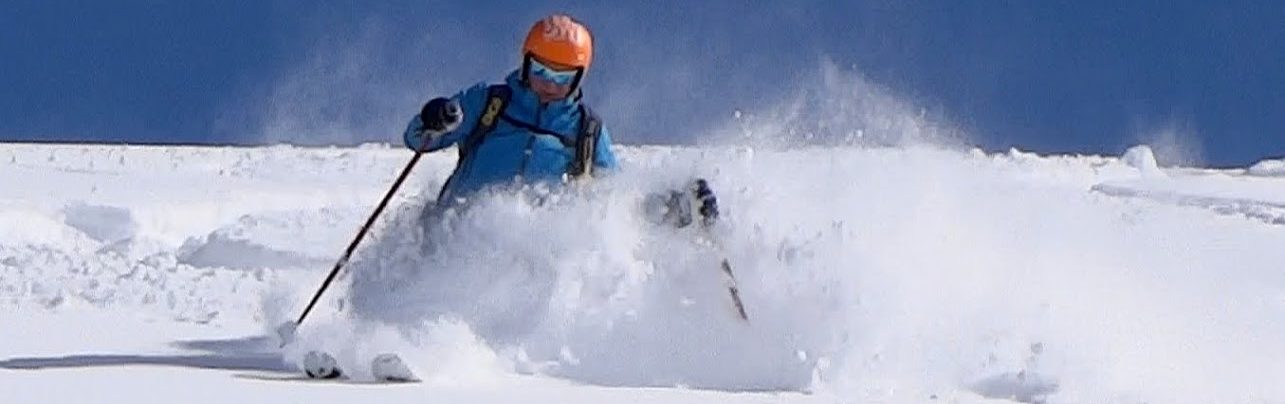
When the entire body inclines into the turn with hip angulation present this below is what it looks like.
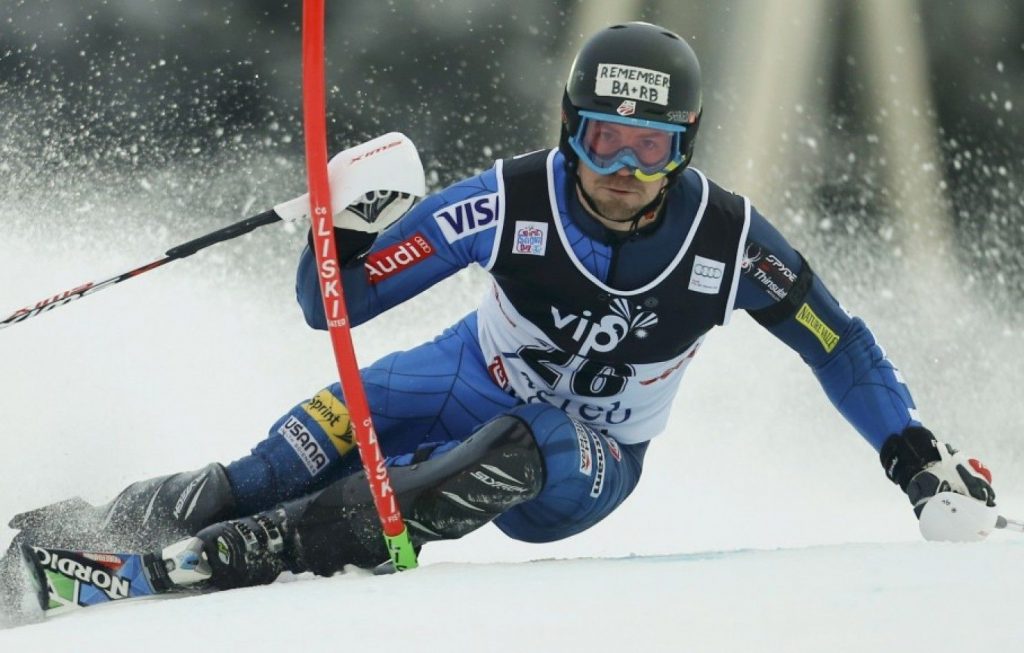
Dynamics 4 (Advanced Angulation)
Creating “angulation” is exactly like dropping one cheek of your bottom onto a chair placed at the side of your body. This gives the impression of “facing downhill” in shorter turns – which is actually an effect not a cause or intention. The action is centred on a relaxation of the hip joint (outside leg) and a falling into the turn particularly in the second half of the turn . The turn initiation (short to medium radius) is with the skier’s pelvis (not necessarily the chest) facing downhill – thrusting the upper body directly downhill while the skis travel across the hill.