Video clip 1: Retracting both legs then extending both legs
Video clip 2: Retracting downhill leg then extending uphill leg
Varying the timings used helps to adapt the body to a greater range of movement and greater dynamic range overall.
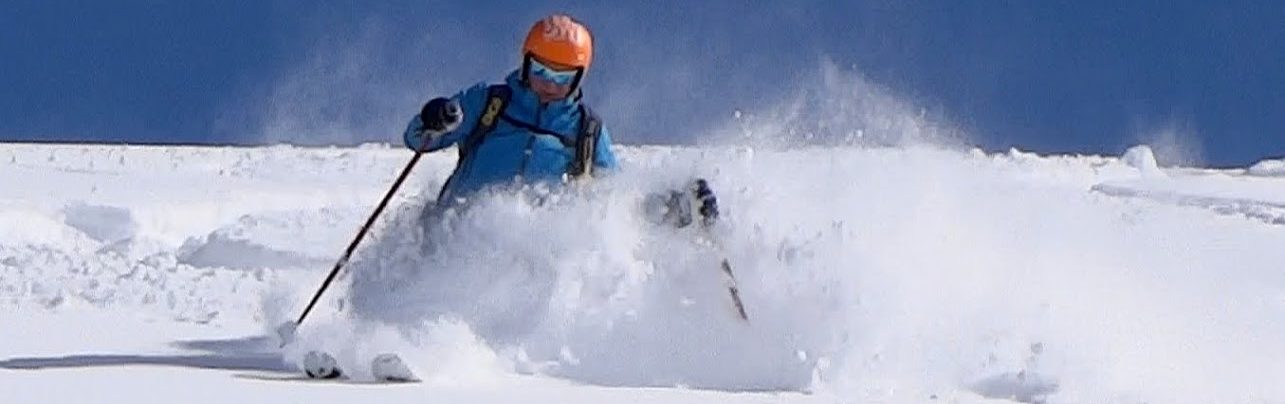
Side Slipping (Centre of Mass)
The main practical purpose of sideslipping is to get down the mountain without picking up speed. Many learners are deprived of this skill because it is generally undervalued and has become even more neglected due to the complete domination of carving skis. Wider skis are easier for sideslipping in a greater range of conditions. Parabolic skis have some trouble gripping on ice during a sideslip, but modern “double rocker” off-piste skis give a smooth and grippy sideslip in just about every condition, including ice.
The skis are kept on edge by the lateral stiffness of the ski boot shafts. Skis over 100mm wide underfoot begin to create problems on hard snow due to the extra leverage from the edge through the shaft of the boot. Those skis can be very unpleasant on-piste and it’s one limit of how an “all round” ski can be defined. Anything wider than 100mm is not “all round”. In ski teaching the sideslip serves specifically for developing fall-line skiing. Fall-line skiing is where the skier’s body travels directly downhill and not across the hill. This would apply to bumps, steep off-piste such as couloirs and deep powder snow. Slalom is not “fall-line” skiing. The skier should be able to sideslip on either ski or both at the same time. It’s normal to start off with both skis on the snow, skis parallel and with the majority of weight on the lower ski just to get a feel for it. The stance is normally quite narrow to prevent the uphill ski from catching the lower edge. Most beginners have trouble keeping the skis close together.
It should be noticed that only the uphill edges of the skis are in contact with the snow so the downhill edges are in the air. If the fronts of the skis are pushed downhill (Joystick Control – moving the Centre of Mass forward) then there will be no resistance from the downhill edges and so the skier goes into a forward diagonal sideslip. Likewise if the tails are pushed downwards during the sideslip then it turns into a backwards diagonal sideslip. Being able to alternate between straight down the fall-line and the two diagonals is a precursor to the skill necessary for pivoting in the fall-line. Both legs need to squeeze the adductor muscles together – holding the upper legs close together. Pulling both legs together keeps a narrow stance and when the skier practices sideslipping on one leg it ensures the that the geometry of the edge angles to the slope are optimum for pivoting.
Advanced Dynamics
Hanger Turns
While leg retraction is the fastest way to get the body across the skis from one turn to the next sometimes instead it is necessary or preferable to direct the body across the hill – where using the downhill ski to complete the turn then becomes desirable.
Visualize a motorbike going into a turn and coming down low to the ground then back up out of the turn to complete it. Then visualize doing all of that on the outside ski of a single turn on skis – letting the ski lift the body up and out of the turn and finishing going across the slope with the skis now flat on the surface. Sometimes the entire turn transition into the next turn can also be carried out on this downhill ski – this being named a “Hanger Turn”. Basically this entails a complete commitment of the centre of mass directed laterally to the skis and downhill.
Compression Turns
Here’s a useful video showing proper compression turns at an advanced level. (Warning! – The drills used to “teach” in the clip are mainly inappropriate and fail to show the pivoting nature of bump skiing. However the advanced dynamics used by the demonstrators are correct.)
Leg Retraction
“Leg retraction” – the extended downhill leg at the end of a turn is retracted to allow the body to cross over the skis into the next turn the fastest way possible – then the new outside leg extends (independent leg action). The video below shows a top World Cup racer using this movement pattern. It’s easier to learn this pattern first and apply it to “normal” skiing before learning how to retract both legs simultaneously with the feet together to absorb bumps.
Introduction to Carving
- while standing still reach one leg out to the side with the ski on edge and then pull it inwards scraping the ground
- now do the same while sliding forward and maintaining some pressure on the extended ski (on gentle and wide terrain)
- the ski will carve an arc with no skidding
- as speed increases the other leg – acting as a stabiliser – can be gradually drawn closer to the extended leg by actively using the adductor muscles
- the main principal exploited here is the direct tension of “pulling” – relating to the analogy of spinning a ball on a string above your head – the only force on the ball is the string pulling inward. Here our centre of mass becomes the anchor pulling the “string”. However – with a bit more speed the “centripetal” force towards the centre comes entirely from the carving ski pushing you inwards.
- the upper body is held over the inside ski – with the belly button centred over the ski and facing the ski tip. Looking down you should see the inside ski midway between your arms.